My Guide for WA dialogs

1. Basic Dialog

Ok, make your NPC and set it's dialog to 1.

Open up the Dialog Editor

Under InterChange #0 write "Hello!" In the game. This will make the NPC Stinker to say "Hello!" when you click on it.

Set FNC to 1

Now, let's do the answers. Under Answer #0 write Hi!

This will make your reply say "Hi!"

Now save it! Save it as your level file name followed by a /1

e.g. Test/1.

dialog1.jpg

2. Moving Text and Text Colours

Go back to the dialog editor and load up the dialog you made last time. Now, let's make the text light blue. Click on the light blue "B" button. Now click on the first letter of your sentence (e.g. The "Hello" part.) Now your text is light blue!

Now let's make it move up and down. click on "UD"

and like last time, click on the first letter of your text.

Now you have light blue moving text!

Save your dialog and try it.

dialog2.jpg

3. Multiple Answers and Interchanges

Do you want more of a conversation where you can choose diiferent answers to say and more things the stinker says?

Yes? OK! Start off a new level, put an NPC Stinker in with Dialog 1

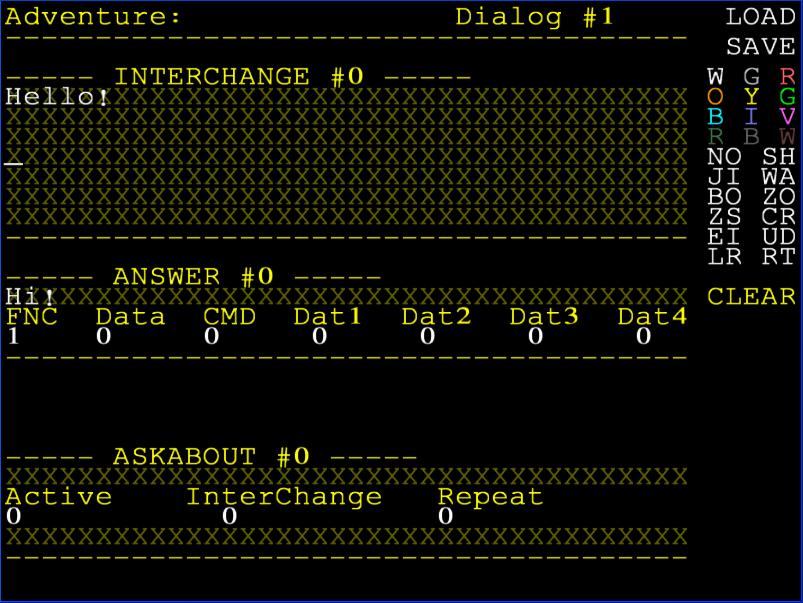
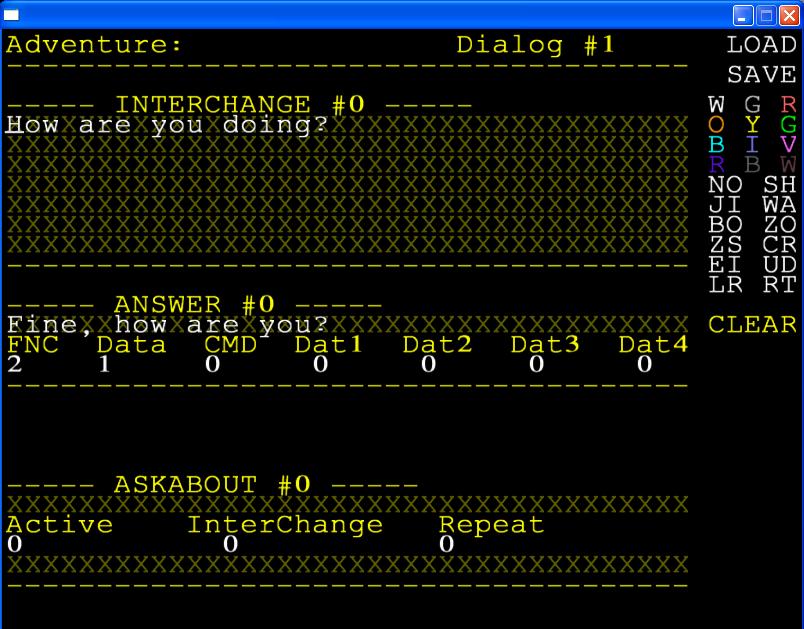
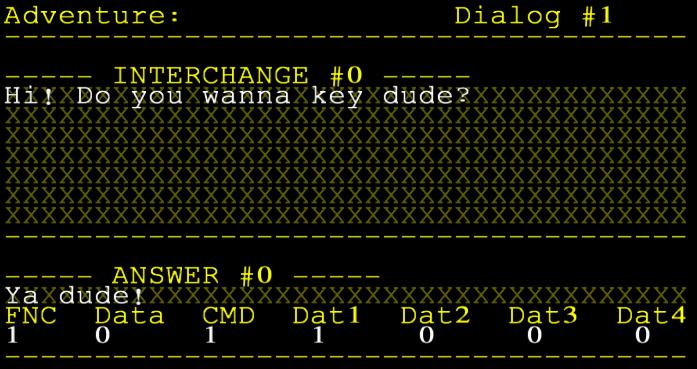
Now to the Dialog editor. In InterChange #0 Let's put something like "How are you doing?"

Put in Answer #0 "Fine, how are you?" Set FNC to 2, yes, 2.

Setting FNC to 1 means when you click on an answer the dialog closes.

Setting FNC to 2 means when you click the dialog, it will take you to another InterChange.

That's the only FNC's you need for now.

But how do you get it to a specific InterChange?

Set "Data" to 1 So it takes you to Interchange #1. The data number you put in will be the number that the InterChange is.

Now to create that Interchange.

Left-Click on Interchange #0. It turns into InterChange 1 (Right-click takes you back one so when you want to go back to InterChange 0 Right-Click to get back)

Because we asked how he was in the Answer in InterChange #0, We need to put something like "Yes I'm fine" in InterChange #1

Set FNC to 1 and keep Data at 0

Let's go back to #0. Right click.

You are now back in Interchange #0

Click on Answer #0. And like Interchanges,

It will go to Answer 1. You can have a maximum of 8 answers, but we are just having two for now.

In answer 1 let's put "No, I'm not. Bye!"

Let's make this answer simple and just close the dialog.

So set FNC to 1. Let's save it now! Try it!

dialog3.jpg

4. NPC gives you a key!
Start up the Editor 3D
Put an NPC in and a Red Key!!! (Change the key's "ID" to 1 before you place it)
With that Red Key - Set Active to No and ID to 1. (The key's ID)

dialog4.jpg

Make a dialog.
Let's put in InterChange #0 "Hi! Ya wanna key dude?"
Answer #0 "Ya dude!" Let me introduce you to CMD! (Short for Command)
Now, this works like "General Command" buttons, but don't worry if you don't know them yet! The first Command in General Commands is "Activate an Object matching the given ID (which is Data1)" So this means that you should put CMD as 1 and Data1 as 1 (because your key ID is 1)
Don't forget to set FNC to 1!
Save and try it!

dialog5.jpg